Calendly and other scheduling tools are awesome. It made our lives massively easier. We’re using it for business meetings, side projects and even yoga classes. However, most tools are very limited in terms of control, customization and data protection. That’s where Calendso & Synpse come in. Self-hosted, all your data sitting on your own machines. API-driven and ready to be deployed on your own domain. Full control of your events and data.
In this tutorial we will be deploying a self-hosted Calendso instance that lives under your own DNS domain. You will be able to share meeting links such as https://calendar.example.com/karolis/quick-chat with your colleagues, clients and friends:

You will also be able to:
- Integrate it with your Google calendar
- Create multiple users for your organization
- Create teams
###Prerequisites
- Synpse account - Deployment
- Webhook Relay account - Networking
- Cloudflare account - DNS & TLS termination
If you don’t have your own DNS domain, just jump in our Discord channel and I will help you out with some alternatives (you can either use Webhook Relay’s subdomains or use services like DuckDNS).
###Configure Cloudflare
- Create a CNAME record

- Download Origin Certificates
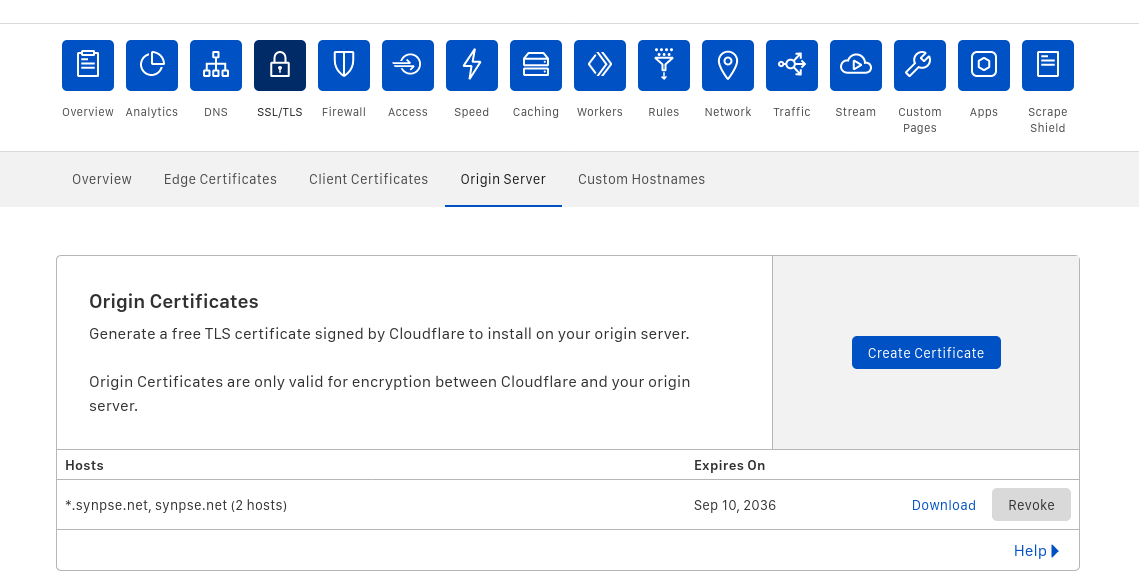
Once they are generated, copy each item to a separate file. We will need to upload them to Synpse later.
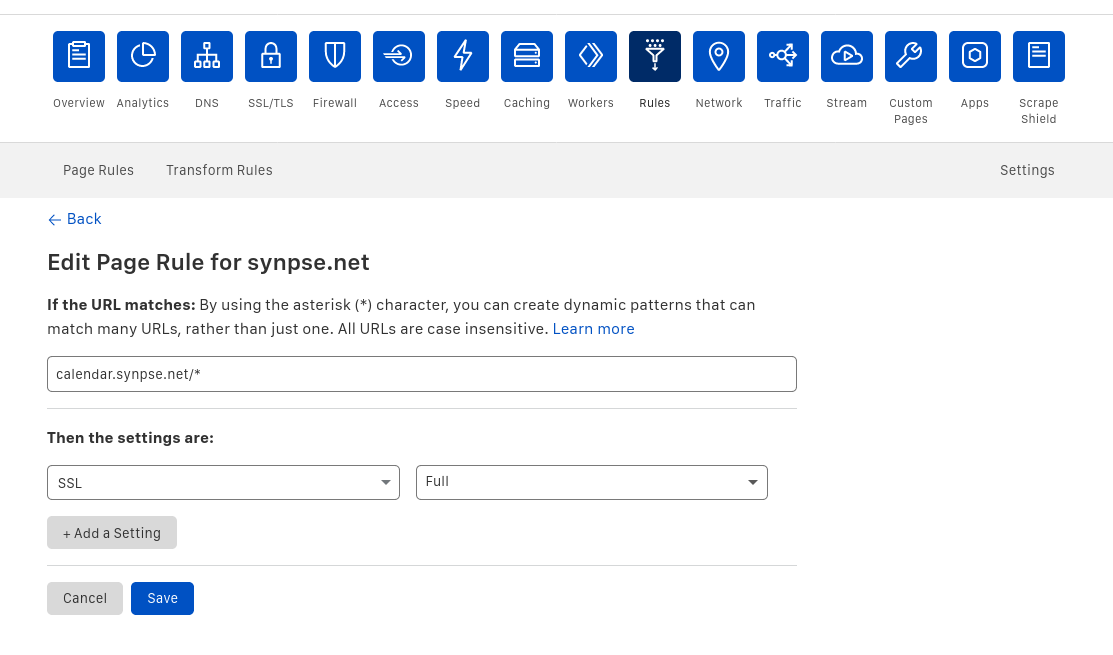
- Create a page rule to ensure full HTTPS
###Configure Webhook Relay
Webhook Relay will be providing us the connectivity between our on-prem server and Cloudflare. You can skip this step if you have a router that can do the port forwarding. In other cases where we either have a dynamic IP or your server is behind a CGNAT - it helps a lot.
It also makes the whole configuration a lot more portable as we are not tied to our server’s IP address anymore.
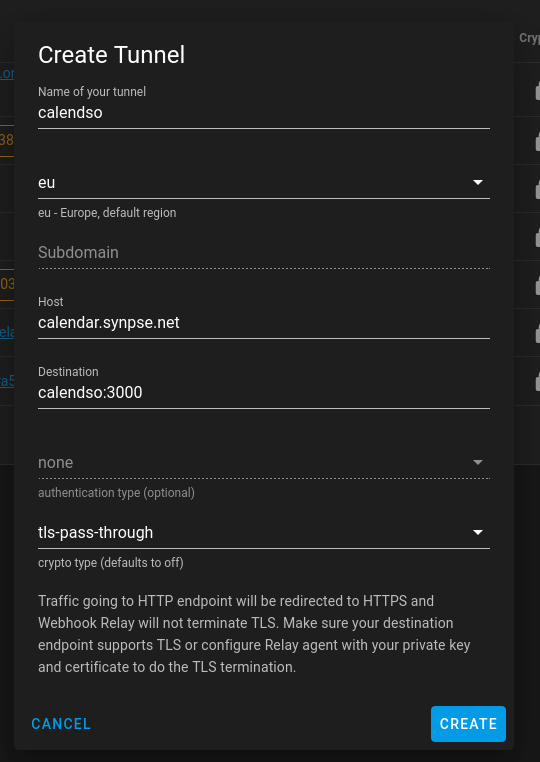
- Create a TLS-pass-through tunnel (tunnels page)
- Get your access key and secret from the tokens page

With this setup, we are ensuring that traffic is encrypted all the way from the client until it reaches your server. Only there does the HTTPS get terminated.
###Integrating with Google calendar
To allow Calendso to read from and write to our Google calendar, we need to create API credentials and provide them to Calendso.
Enable API
To do that, head to the Google API console and create a new project. It might take a little bit for Google to set up your project but once that’s done, head over to the project and click the Enable APIs and Services button.
Once you click the button, you’ll be taken to the API library. In the search box, look for calendar and select the Google Calendar API result and then enable it.
Retrieve credentials
Next, let’s head to our credentials page in the Google API console so we can create the Calendso OAuth ID and add our production origin and redirect URI.
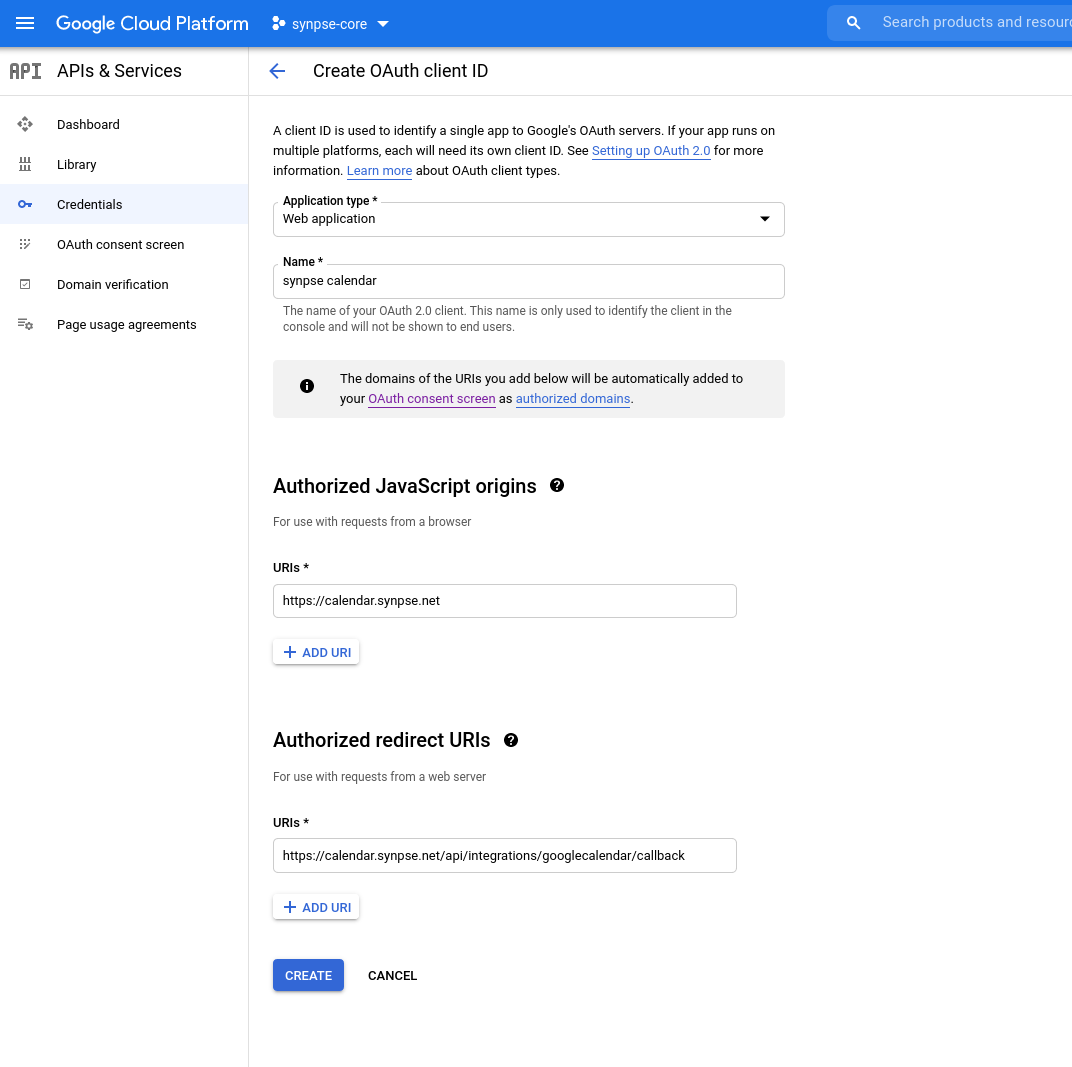
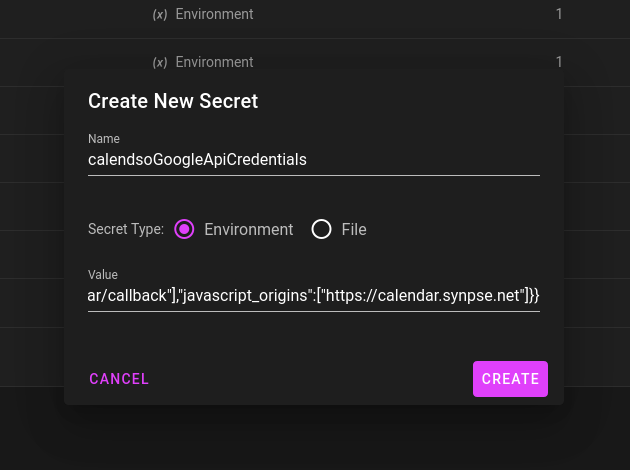
Your key will be created and you’ll be redirected back to the Credentials page where you will see your newly generated OAuth 2.0 Client ID. Select the download option and save this file to your computer. Copy all the contents of the file and add that as the value for the GOOGLE_API_CREDENTIALS environment variable:
###Deploy through Synpse
With Synpse we will be deploying multiple containers to provide us with admin capabilities, database, tunneling (to expose it to the internet) and the Calendso itself.
Preparing the secrets
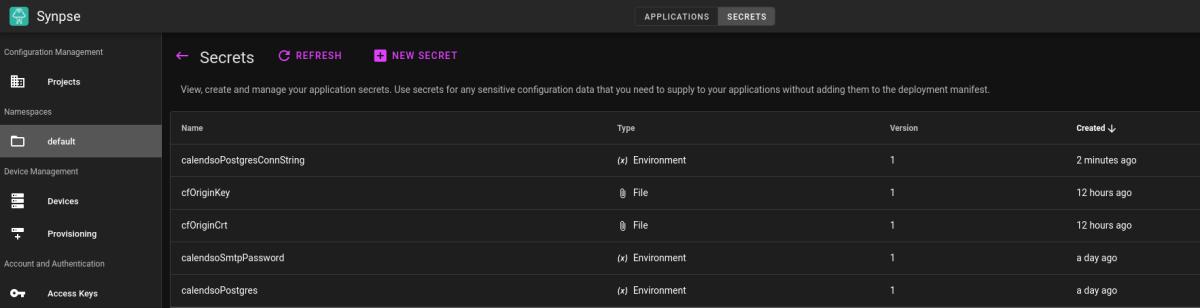
First, go to your secrets page and create:
calendsoPostgreswith your database passwordcalendsoPostgresConnStringwithpostgresql://calendso:PASSWORD@postgres:5432/calendso(just replace PASSWORD with your database password)cfOriginKeywith Cloudflare origin certificate keycfOriginCrtwith Cloudflare origin certificaterelayKeyandrelaySecretwith access token from https://my.webhookrelay.com/tokens
Creating the application
The full spec looks like this:
name: synpse-calendso
scheduling:
  # This will depend on your device labels,
  # see https://docs.synpse.net/synpse-core/applications/scheduling
  type: Conditional
  selectors:
    type: controller
spec:
  containers:
    - name: calendso
      image: ctadeu/calendso:0.0.17-1
      env:
        - name: BASE_URL
          value: http://calendar.synpse.net
        - name: NEXTAUTH_URL
          value: http://calendar.synpse.net
        - name: DATABASE_URL
          fromSecret: calendsoPostgresConnString
        - name: CALENDSO_ENCRYPTION_KEY
          value: very-secure,generate_me # run "openssl rand -base64 32" to generate a random string
    # Prisma is only needed during the setup
    - name: prisma
      image: codejamninja/prisma-studio:latest
      ports:
        - 5555:5555
      env:
        - name: POSTGRES_URL
          fromSecret: calendsoPostgresConnString
      restartPolicy: {}
    # Postgres is where Calendso stores the data about users and events
    - name: postgres
      image: postgres:latest
      volumes:
        - /data/calendso-postgres:/var/lib/postgresql/data
      env:
        - name: PGDATA
          value: /var/lib/postgresql/data/pgdata
        - name: POSTGRES_USER
          value: calendso
        - name: POSTGRES_DB
          value: calendso
        - name: POSTGRES_PASSWORD
          fromSecret: calendsoPostgres
    # Relayd container provides network connectivity
    - name: relayd
      image: webhookrelay/webhookrelayd:1
      args:
        - --mode
        - tunnel
        - --keyfile
        - /certs/tls.key # This is Cloudflare Origin Certificate key
        - --certfile
        - /certs/tls.crt # This is Cloudflare Origin Certificate
        - --domain
        - calendar.synpse.net
        - -t
        - calendso # Tunnel name that you chose when creating it in WHR dashboard
      env:
        - name: RELAY_KEY
          fromSecret: relayKey
        - name: RELAY_SECRET
          fromSecret: relaySecret
      secrets:
        # Mounting secrets as files
        - name: cfOriginCrt
          filepath: /certs/tls.crt
        - name: cfOriginKey
          filepath: /certs/tls.key
Now, if you click on Allocations, you should see all containers running and in device details you can see the ports:

If you click on Prisma and if your device is locally reachable, you will be able to access the admin dashboard.
Please note, that if your device is exposed to the internet, you should not leave the Prisma container with the port exposed.
Once in Prisma, follow the official guide from self-hosting section and:
- Click on the User model to add a new user record.
- Fill out the fields (remembering to encrypt your password with BCrypt) and click Save 1 Record to create your first user.
Once you have logged in, go to the integrations section and connect it with the Google’s calendar.
###References
- Calendso docs: https://docs.cal.com/
- Synpse docs: https://docs.synpse.net
- Webhook Relay docs: https://docs.webhookrelay.com
- Cloudflare: https://cloudflare.com
